Table of Contents Show
A Guide on How to Make Window Flower Boxes
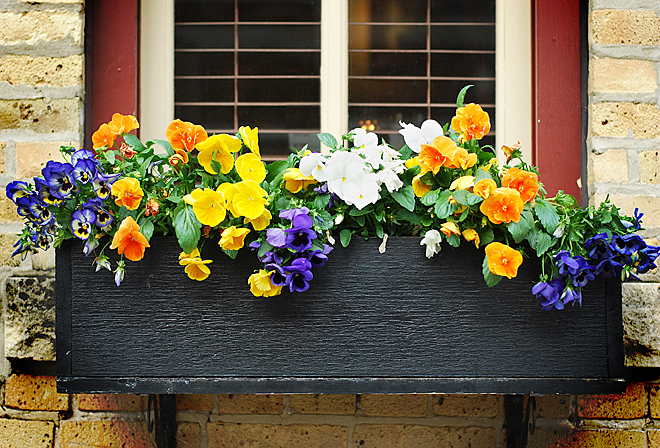
Window flower boxes are a great method of growing and displaying a variety of flowers, and can be used all year round. Window flower boxes are easily made from wooden panels, and can be painted or varnished. They are supported by steel brackets fitted to the wall, below the window ledge.
Introduction
Window flower boxes can be made by the average DIY person using common wood-working tools, and wooden panels. Here we will learn how to successfully make a window flower box. We begin by listing the materials and tools needed.
Materials and Tools Required
Dimensions of the Window Flower Box
The size of a window box is governed by the width of the window. However, if the house has a large picture window, it would be better to use two boxes evenly spaced.
A normal bedroom window is about 4’ wide, so the window flower box will be made 3’6” long, and centered below the windowsill.
Materials Required to Make a Window Flower Box
Wood for the Frame
11/2” square; supplied in 6′ lengths
4 pieces 6” long = 24″
4 pieces 12” long = 48”
4 pieces 33” long = 132”
Total = 214” = 17’ 10”
So 3 x 6’ boards are necessary.
Wood Boards
These are supplied in lengths of 36″ x 1″ thick x 9″ wide and come in packs of 5 pieces.
3 pieces 1” thick @ 36” x 9”.
2 pieces 1” thick @ 12” x 9”.
So we need 4 lengths: 1 pack.
- Adjustable wall brackets – 3 of these required
- Screws– 1 box of 50
- Wood glue– 1 tube
- Hammer fixings– 6mm (1/4”); DIY stores supply hammer-fixings in strips of 10, see Weblink: rawlplug hammer fixings for types and method of use.
- Plastic liner–1 piece of recycled plastic or bubble-wrap
- Small stones or broken ceramic pieces– recycled from garden
- Paint or varnish– 1 quart per window
Tools Required
- Hand-saw
- Screwdriver
- Hammer drill and 6mm masonry drill
- Hand hammer
- Paintbrush
- Sandpaper
- Level
- ¾” wood drill
- Staple gun or box of thumbtacks
Safety Gear
- Work-gloves
- Eye protection
How to Make the Window Flower Box
Frame
Measure the square wood and cut it to the required lengths.
Screw together as per the drawing below, using wood glue between the joints then attach with screws.
Check that the overall dimensions are 36” x 9” x 12”.
Wood Boards
Measure and cut the boards to lengths.
Drill six – ¾” holes in the bottom board to act as water drains.
Attach the side and bottom boards to the frame using wood glue and screws as per the drawing below.
Attach side panels using the same method.
It can be painted or varnished. Some people choose not to coat the inside of the box. I have never had any problems with contamination of the soil from paints. Select toxin-free paint.
Once dry, attach the liner to the inside of the box using thumbtacks or a staple gun. Remember to put quite a few drain holes in the bottom of the box, then put stones or broken ceramic on the bottom to serve as drainage.
Attaching Brackets to the Wall
Above is a link to the Rawlplug website in the material section, which shows how the rawlplug is used to attach items to cement, brick, and mortar.
Measure the width of the window and put a vertical center line down the wall using a pencil. Install the brackets on either side of the center line with one on the line at 12-14” below the windowsill. Mark the position of the holes in the brackets on the wall. Wearing hand and eye protection, drill holes in the wall using a masonry drill bit and hammer drill.
Push a rawlplug into the holes and line up the bracket holes, and then insert the steel nails through the bracket into the rawlplug.
Using a hammer, hammer the steel nails supplied with the rawlplugs until the head of the nail is almost tight against the bracket. Recheck that the bracket base plate is level, and then drive the nail against the bracket.
Repeat for the other two brackets, ensuring that the base plates are level with one another.
Once the brackets are secure, the box can be mounted onto them and attached using a brass screw through the bracket base plate into the base of the box.
Flower plants can, at last, be inserted into the soil, and well watered– enjoy!
Summary
Making a window box is a relatively easy project to do, provided the proper measurements are done and the materials and tools, including safety gear, are obtained.
The frame is made first from square section wood then smooth boards attached to it.
Once completed, the box can be painted or varnished to match the outdoor décor.
Drainage is provided through holes in the bottom of the box, along with small rocks or broken ceramic.
Brackets attached to the wall below the window hold the boxes centrally and level. Once the box has been fitted to the brackets, soil and flowers can be added.

